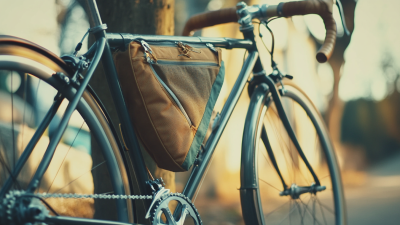
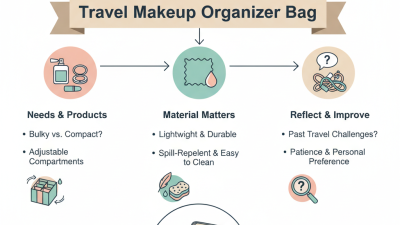
How to Choose the Best Bicycle Frame Bag

Choosing the right Bicycle Frame Bag is not simply a matter of selecting the largest capacity. It is a practical decision involving frame geometry, riding distance, weather exposure, and personal packing habits. PeopleForBikes’ 2024 U.S. Bicycling Participation Study reported that approximately 112 million Americans rode bicycles in 2023. That participation scale reflects a wider need for reliable, organized carrying solutions. A well-fitted frame bag can hold tools, snacks, a phone, and a compact rain shell without overloading the rider’s back.

Small details matter.

Industry research also shows a growing global bicycle market. Grand View Research estimates that the market will continue expanding through 2030, supported by commuting, recreation, and adventure cycling. However, market growth does not make every bag suitable for every bicycle. A road frame may have limited clearance, while a gravel or touring frame often provides more usable space. The best choice should match the actual triangle area, tube shape, bottle-cage position, and cable routing.

Measure carefully.

This guide examines capacity, attachment systems, fabric strength, waterproofing, zipper design, and weight distribution. It also considers real riding conditions, such as muddy trails, sudden rain, and repeated zipper use. A waterproof label can be misleading when seams remain unsealed. A spacious bag may also interfere with knees or bottle access. These are easy mistakes, and they still happen. The most dependable decision comes from comparing specifications with hands-on fit, not trusting attractive photographs alone. A Bicycle Frame Bag should disappear during the ride, while keeping essential equipment secure and reachable.
How to Choose the Best Bicycle Frame Bag

Understanding the Purpose and Types of Bicycle Frame Bags

A bicycle frame bag turns unused space inside the frame into practical storage. It keeps tools, snacks, a pump, and a rain shell close to the bike’s center. That position can improve balance compared with loading everything behind the saddle. The 2024 Outdoor Participation Trends Report from the Outdoor Industry Association recorded 175.8 million American outdoor participants. More riders are carrying equipment farther, but a frame bag is not automatically the best answer.

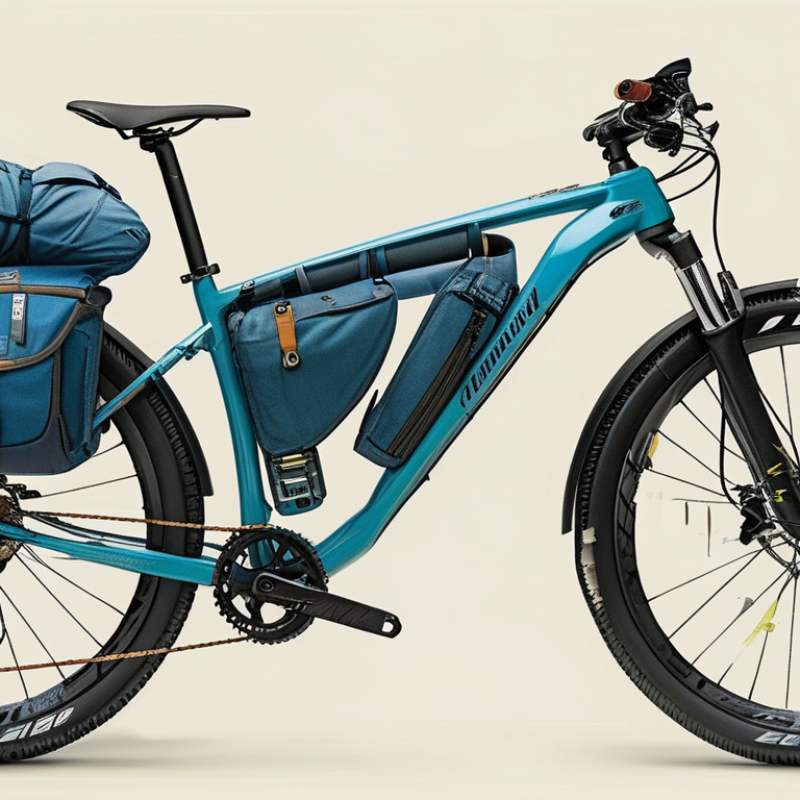
Frame bags usually come in three forms. A half-frame bag leaves room for bottles and suits short rides. A full-frame bag uses the entire triangle and works well for touring or bikepacking. A top-tube bag offers quick access to cash, keys, or energy gels. I have found that zipper placement matters more than expected. A bag that rubs your knees becomes irritating within minutes. Measure the frame carefully, including cables, bottle cages, and suspension movement.

Material choice also defines the bag’s purpose. Lightweight fabric reduces bulk, while sealed seams and water-resistant zippers provide better protection during wet commutes. The 2023 Global Bicycle Accessories Market analysis by Grand View Research estimated strong market growth through 2030, reflecting wider interest in practical cycling equipment. However, market growth does not prove every design is useful. I still question glossy specifications. Check capacity, mounting stability, and access with gloves before buying. Small details matter.

Measuring Your Bike for a Proper Frame Bag Fit

Choosing the best bicycle frame bag starts with accurate measurements, not guesswork. Place your bicycle upright on level ground. Remove bottles, pumps, and loose accessories before measuring the frame triangle.

Measure the top tube from the seat tube junction to the head tube junction. Then measure the down tube and seat tube inside the triangle. Record the shortest usable length, not the tube’s full outside length. Check the frame’s width near the bottom bracket and near the head tube. These areas may differ noticeably. A paper or cardboard template helps reveal the real shape.

I learned this the hard way. My first measurement ignored a brake cable, so the finished bag pressed against it. Leave clearance around cables, suspension parts, and moving components. About one to two centimeters can help, but confirm the bag maker’s fitting guidance. Measure both sides if the frame has unusual geometry or storage mounts. Small differences matter.

Keep the tape measure straight. Write every number down. A second person can improve accuracy, especially on sloping top tubes. Compare your measurements with the bag’s internal dimensions, not only its listed length and height. Remember that zippers and seams reduce usable space. A snug fit should stay stable on rough roads without rubbing the frame. Oversizing feels tempting, yet it can interfere with pedaling or steering. My own measurements were not perfect, and rechecking them prevented an expensive mistake.

How to Choose the Best Bicycle Frame Bag - Measuring Your Bike for a Proper Frame Bag Fit
Measurement or Selection Factor How to Measure or Assess It Recommended Fit Target Why It Matters
Step 1: Measure the Bicycle Frame
Top-tube length Measure the usable distance along the top tube from the seat-tube area to the head-tube area. Follow the tube rather than measuring in a straight line. Choose a bag length that is approximately 10–25 mm shorter than the available usable length. Allows space for the bag’s front and rear attachment points without forcing the bag against the frame.
Seat-tube to down-tube length Measure the largest vertical or diagonal opening inside the main frame triangle, from the seat-tube junction toward the down-tube junction. The bag should remain inside the triangle and should not extend beyond the frame tubes. Prevents interference with the rider’s legs, cables, bottle cages, and frame hardware.
Down-tube clearance Measure the available space from the down tube to the crank area and from the down tube to any bottle-cage mounts or frame accessories. Leave at least 15–25 mm of clearance around moving parts and attachment hardware. Reduces rubbing and protects the bag from contact with the crank, cables, or mounting bolts.
Head-tube width Measure the width of the head-tube area where the front of the bag will sit. Include cable housing, brake hoses, and headset spacers in the available-space assessment. The front of the bag should fit without sharply bending or compressing cables and hoses. Excessive pressure can restrict steering or damage cable housing and hydraulic hose routing.
Seat-tube width Measure the width of the seat-tube area and inspect the seatpost clamp, seatpost, and rear attachment zone. Keep the rear of the bag clear of the seatpost clamp and allow room for normal saddle-height adjustment. Prevents the bag from blocking seatpost movement or interfering with the seat clamp.
Frame-tube circumference Wrap a flexible tape around each tube where straps will be placed. If using a ruler, measure the tube diameter and calculate circumference using circumference ≈ diameter × 3.14. Use straps long enough to wrap the tube plus the bag panel, with several centimeters of adjustment remaining. Provides secure attachment without excessive strap tension or loose, shifting straps.
Bottle-cage and accessory mounts Mark the position of bottle bosses, pump mounts, frame protectors, and internal cable ports before selecting the bag. Choose a bag with compatible openings, external mounts, or a shape that does not cover essential hardware. Maintains access to bottles, tools, pumps, and service points.
Suspension and moving components On full-suspension bicycles, compress the suspension through its usable travel and check the gap between the frame, shock, linkage, and bag location. Leave clearance throughout the suspension movement; do not measure only with the bicycle stationary. Prevents the bag from being crushed or contacting moving suspension components while riding.
Step 2: Match the Bag to the Measured Space
Bag length Compare the manufacturer-independent bag length with the measured top-tube or frame-opening length. Bag length should be shorter than the usable frame length, with approximately 10–25 mm of total spare space. A slightly shorter bag is easier to install and less likely to rub against frame junctions.
Bag height Compare the bag’s maximum height with the frame opening measured from the top tube toward the down tube. Allow approximately 10–20 mm of clearance from adjacent tubes, cables, and accessories. Prevents pressure points and leaves room for fabric movement when the bag is loaded.
Bag width Measure the gap between the rider’s knees, frame-mounted accessories, and any protruding cable or hose sections. The bag should not noticeably contact the rider’s knees during normal pedaling. Improves comfort and reduces repeated abrasion on both clothing and bag fabric.
Bag volume Estimate the equipment to be carried, including clothing, food, tools, electronics, and spare parts. Use a smaller bag for compact essentials and a larger bag only when the frame triangle provides sufficient clearance. Avoid filling the bag until it bulges. Overfilled bags can change shape, rub the legs, stress zippers, and reduce frame clearance.
Bag shape Compare the bag profile with the frame triangle. Common profiles include triangular, half-frame, and full-frame designs. A full-frame bag should closely follow the frame outline; a half-frame bag should leave room for bottles or other accessories. A close profile maximizes usable storage while reducing movement and wasted space.
Attachment method Check whether the bag uses straps, attachment points, or a combination of both. Match the method to the frame’s tube shape and available mounts. Attachment points should sit on stable tube sections and should not cover moving parts or vulnerable cable ports. Correct positioning helps prevent shifting, noise, paint wear, and strap failure.
Step 3: Final Fit and Safety Check
Crank and pedal clearance Rotate the cranks fully while the bag is installed and loaded with typical contents. No part of the bag or its straps should contact the cranks, pedals, or rider’s shoes. Ensures safe pedaling and prevents damage caused by repeated contact.
Steering and cable check Turn the handlebar fully left and right and observe brake hoses, gear housing, and control cables near the bag. Cables and hoses should move freely without being pulled, kinked, or trapped. Protects steering function and helps maintain reliable braking and shifting.
Strap tension Install the bag, load it normally, and press it gently from side to side. The bag should remain stable with no visible sag, while the straps should not deform the frame or bag. Balanced tension reduces vibration, rattling, and long-term abrasion.
Frame protection Inspect every contact point between straps, buckles, hook-and-loop fasteners, and the bicycle frame. Use protective film or soft frame protection beneath areas that may rub, especially on painted or carbon surfaces. Reduces cosmetic wear and helps prevent damage from dirt trapped under the straps.
Loaded test ride Ride briefly over smooth and uneven surfaces with the bag loaded as it will be used. Recheck clearance, strap position, zipper access, and contact points after the test ride. A loaded test confirms the real-world fit because fabric can shift or expand during riding.
Fit decision Compare all measured clearances with the bag’s dimensions and inspect the bicycle in its normal riding configuration. Select the bag only when it clears moving parts, does not restrict cables, and remains stable when loaded. Proper fit improves comfort, storage efficiency, bicycle control, and equipment durability.

Choosing the Right Materials, Capacity, and Weight

How to Choose the Best Bicycle Frame Bag

Choosing the right frame bag starts with its material. In wet conditions, coated nylon can resist rain, mud, and repeated rubbing against the frame. Lightweight woven fabrics reduce carrying weight, but they may show wear sooner on rough trails. I check the stitching, zipper protection, and contact points before buying. A bag that feels strong in the hand often performs better after months of vibration.

Capacity should match your actual trips. A compact bag may hold tools, snacks, and a spare tube for short rides. Longer journeys need more space for clothing, batteries, or cooking items. However, filling every corner can make the bicycle feel unstable. I once carried too much inside a large bag and noticed slower steering on climbs. That experience changed my view of “extra space.”

Tips: Measure the frame carefully. Check the top tube, seat tube, and bottle mounts. Choose a shape that leaves room for your knees and cables. Keep heavy items low and near the center of the frame. Test the bag with real equipment before a long ride. Do not trust capacity alone. A lighter bag can improve handling, but an ultra-light design may sacrifice durability. Consider where you ride, how often you carry gear, and whether easy access matters more than maximum volume.

Evaluating Mounting Systems, Accessibility, and Stability

Choosing a bicycle frame bag starts with its mounting system. PeopleForBikes’ 2024 U.S. Bicycling Participation Study reported that 112 million Americans rode bicycles in 2023. More riders also mean more varied setups. Your bag must match your frame, not only your route.

Bolted mounts usually hold firmly on long gravel rides. They reduce side-to-side movement, especially when the bag carries tools or food. However, frame bosses may not exist on older bicycles. Straps offer wider compatibility. They can also rub paint and loosen after repeated impacts. I check strap tension after the first hour. Small adjustments matter. A full bag should not touch brake hoses, cables, or moving knees.

Accessibility affects safety and comfort. The Outdoor Industry Association’s 2023 participation report recorded 52.2 million U.S. road cyclists in 2022. Many rides include short stops, so opening the bag while standing matters. A wide zipper helps, but excessive opening can reduce structure. I prefer separate pockets for a phone, repair items, and snacks. Stability remains the harder test. Place dense items low and near the frame’s center. Then shake the bicycle gently. If the bag swings, the design needs improvement. I once trusted a tight strap system too quickly; after wet gravel, it slipped several centimeters. Industry standards such as ISO 4210 address bicycle safety, not frame-bag stability. Real-world testing is still necessary.

Comparing Weather Protection, Durability, and Overall Value

A frame bag should match your riding conditions, not just your frame geometry. The 2024 PeopleForBikes participation report recorded 112 million Americans riding bicycles in 2023. That broad use includes wet commutes, dusty gravel, and short recreational trips. Each setting tests materials differently. I learned this after choosing a light bag that soaked through during one storm.

For weather protection, inspect the fabric coating, zipper construction, and seam treatment. IEC 60529 defines IPX4 as protection from water splashes, while IPX6 covers powerful water jets. However, these ratings describe tested enclosures, not every textile bicycle bag. Treat them as useful clues, not proof. A roll-top closure usually limits rain entry better than a long exposed zipper. Small details matter.

Durability requires more than thick fabric. ISO 12947 measures textile abrasion resistance with Martindale cycles, but manufacturers may test different materials and conditions. Ask for the test method. Reinforced attachment points, smooth interior panels, and replaceable straps can extend service life. Check for stitching near the seat tube and head tube, where rubbing is common. Value depends on cost per ride, not purchase price alone. A cheaper bag used twice is poor value. I still sometimes overestimate waterproofing and underestimate repairability. That mistake costs more than a few extra grams.